

How to Solve a Windmill Cube?
Another Type of Rubiks’ Cube is a Windmill Cube. It is just like a
traditional cube which has to move along the diagonals. It is a somewhat
difficult look when scrambled. But the method is just as normal as a
3x3x3 cube as CFOP.
1.
Cross – making the cross with matching side centres.
a.
If it is a coloured cube, the side colour should match when making the
cross
b.
If not coloured, need to identify the correct side by shape and make the
cross
2.
Fix the bottom corners
3.
Fix 2nd layer edges
4.
Orientation Last Layer
5.
Permutation Last Layer
It is somewhat difficult when OLL and PLL algorithms perform with a
single colour cube. Because only we have check shape is the matter to
consider.
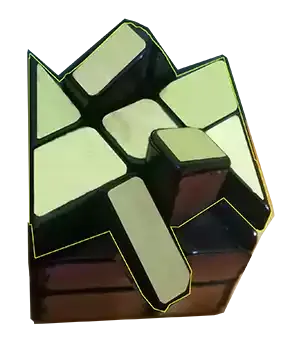
At a glance, a 3x3x3 Windmill Cube looks like a 2x2x3. Windmill
shapes are for TOP and BOTTOM when it keeps just like as bellow image;

Without their triangular corners, it looks like a Windmill. Corners, centres and edges are identical in each layer but not of them are similar to other layers. If the large pieces layer is kept to the bottom and look, The bottom layer is trice than the TOP layer and the second layer is twice than the TOP layer.
We can see only the cube shape when it is solved, otherwise, it shows like a mesh.

as shown in the above image, it is a real mesh when scrambled.
The most difficult part is making the cross. Identifying the centre with
the correct edge and rotating it to the opposite layer to make a cross is
a little bit challenging.
We can start to solve the cube from the big pieces side or the small
pieces side. I prefer to start with the big.
Unlike TOP and BOTTOM centres, side centre pieces are not matched with edge pieces with horizontal and vertical sides. It is connected to the slope edge.
So, if we going to start with the big pieces layer for making the cross, move one big piece edge to the top small pieces layer and matched it with one of the centrepieces and rotate it back to the big layer.
As shown in the image, shows a big layer edge with side centres.

Likewise need to do for whole sides. It will make a cross with the
correct centres.
If we consider the second layer edges,
The correct edge piece should be kept at the top of the Front layer centre piece, then move either to the right or left. If we consider the triangular edge piece, it is not like a symmetrical prism.
The second layer's edges are just like a right-angle triangle with 3 different sides(legs). If the Hypotenuse (the longest leg) should be kept to the front side and the long leg side (the Hight of the triangle) out of the other two sides to the back side, the piece should be moved towards the RIGHT side.
Otherwise, it should
be moved towards the LEFT side ( if the short leg facing to the back).
Then comes the final layer. when it comes to the final layer no need to
consider so many algorithms to remember.
The only thing to make a cross, we need to check whether it is a line from
the left to the right or an “L” shape from the left to the back
As the image shows, it is a line. Keep it as described earlier, from left
to right. And do the following small algorithm
FRUR’U’F’
It will make the Upper layer cross.

Now time to fix the TOP layer corners.
Rotate the whole cube along the z-axis anti-clockwise once.
No use R’U’RU
until fixing the imparity corner, then move another imparity corner to
the TOP – Left corner and do the same algorithm. Likewise, follow the
R’U’RU until fixing the cube.
Or keep the cube as it is. Then rotate one imparity corner to the TOP-RIGHT
corner and do the following algorithm.
R’D’RD
until the imparity corner is fixed. Then move another imparity corner to the
TOP-RIGHT corner and do the same algorithm. Likewise, follow the same
algorithm until fixing the cube.
You can use either the first method or the second at your convenience.
In the Windmill Cube, normally we start from the square centre sides either big pieces or small pieces. But we can use the other side as the base and fix the cube but it will be more complicated when find the cross to make.
But after making the cross, it is not much difficult to fix
the cube but sometimes, there will be an extra algorithm at the end. The
TOP centre piece will be flipped but by using the following algorithm, it
will also fix easily.
Use RUR’U

As shown in the image, the TOP later centre piece will be flipped when
fixing the cube with a sloping bottom sometimes.
So, Keep as just as shown in the above image and do the Algorithm “ R
U R’ U “.
The Cube will be fixed.
No comments:
Post a Comment